CLICK HERE FOR FREE BLOGGER TEMPLATES, LINK BUTTONS AND MORE! »

Saturday, October 29, 2016

Say no to Antibacterial Ointment

If you have kids, of any age, you know there is one thing that they always seem to have: cuts and scrapes. Whether is from falling off their bike or the cat was just done being loved on (a common occurrence for my younger kiddos) someone always has a boo-boo. And for me one of the things that I have kicked to the curb, in my house, is the use of the beloved triple antibiotic ointment. And I bet you wonder why. Simply put: bacteria have learned how to circumvent antibiotics. Meaning they are no longer affected by them. The overuse of antibiotics has lead to the accidental development of "superbugs." So outside of doctor prescribed antibiotics for severe infections, we don't use them. So what do I use on scratches and scrapes?? If I use anything, I use a very simple mix. And when I say simple, I mean it. But before I get into that, Lets look at the main ingredients in a basic over the counter triple antibiotic ointment.

Active Ingredients: Any component that provides pharmacological activity or other direct effect in the diagnosis, cure, mitigation, treatment, or prevention of disease, or affects the structure or any function of the body of man or animals.

Neomycin: is an antibiotic that's used to prevent or treat bacterial infections.
Polymyxin B: is an antibiotic primarily used for resistant gram negative infections
Bacitracin: is an antibiotic that stops the growth of certain bacteria.

Inactive ingredients: the ingredients that do not exert the intended therapeutic effect, and do not cause the side effects, known or unknown, associated with the particular drug. (they can very from name brand to generic brand, but for this purposed I am looking at a well known name brand)

Cocoa Butter: After Coco beans are cleaned, they are roasted and then pressed in hydraulic machinery, oozing forth cocoa butter
Cottonseed Oil: is a cooking oil extracted from the seeds of cotton plants. (High chance this is from a GMO crop)
Olive Oil: Olive oil  the oil obtained from the fruit of olive trees.
Sodium Pyruvate: "is added to many media formulations as a carbohydrate source that cells can easily access for energy production."

White Petrolatum: Distilled from petroleum.

Umm.....Not sure about you, but I only like two of those eight ingredients. So now that you have seen what's in a triple antibiotic ointment, what's the simple mix I use for cuts and scrapes?

Thieves Oil and Coconut oil. Yen, it doesn't get much simpler then that!

Thieves oil is a blend of 5 essential oils: Lemon, Clove bud, EucalyptusCinnamon and Rosemary. Different companies use different plant species to make their own blends, so when selecting your thieves oil, that is something to keep in mind. Also keep in mind that it may not be called "thieves oil." One company calls their blend "germ fighter." You can also make your own thieves mix by buying a vial of each of the above listed oils and mixing them. I found this recipe over at No Ordinary Homestead to share with you. If you want to make it a concentrate, just leave off the Jojoba oil, and use the drop amount she has listed for each essential oil.


  • 50 drops (1.9 ml) clove oil (Syzygium aromaticum a.k.a. Eugenia aromaticum or Eugenia      caryophyllata)
  • 50 drops (1.9 ml) lemon oil (Citrus limon)
  • 38 drops (1.5 ml) cinnamon oil (Cinnamomum verum a.k.a Cinnamomum zeylanicum)
  • 30 drops (1.25 ml) rosemary oil (Rosmarinus officinalis)
  • 30 drops (1.25 ml) eucalyptus oil (Eucalyptus radiate)


  • How do you make the Scratch and Scrape salve? Well you need four things:
    *Coconut Oil:
    *Thieves Oil blend: (always test a small amount on your skin to make sure you do not have an allergic reaction. Just because these are natural doesn't mean you wont react to them, and never apply full strength to your skin. Always apply a diluted mix of carrier oil and essential oil)
    *Small glass jar:  If you don't want to but them, use a baby food jar! I actually have an entire tub of them from when my daughter was a wee babe. The jars from the meats are a bit smaller, and work the best for small batch items like this. (Yes use glass, because while essential oils are natural plant extracts they are still chemicals and can react with plastic)
    *Toothpick.
    Put 1 tablespoon of coconut oil in the jar, then add three drops of thieves oil blend. I use the toothpick to mix it up. Put the cap on and your done! Seriously easy right?

    And for those of you who are interested in learning more about essential oils, go see my girl over at The Oily Empire. She has been doing pod casts that talk about different oils, what they are good for, how to use them. She is also very responsive on her Facebook page, plus she is a total sweetheart! Here are links to her podcasts through iTunes and Google Play (just click the name and it will take you there!)

    There are also quite a few studies of essential oils and their antibacterial properties, if you know where to look. Here is one for Clove that I was able to locate. I will update and add more links for the other oils listed in this post, as I find them.


    This article does contain affiliate links.


    Thursday, October 27, 2016

    Making changes: Food matters

    I am going to preface this by saying I am just a mom. A normal, everyday, person. I am speaking from my place as a parent and consumer. I am not a scientist or an expert, so what I write is from my personal opinions and understanding. I have done my best to attach hyperlinks where needed, but I will include those same links, and others, at the bottom of the post so you can read up and look into things yourself.

    One of the things that I have noticed over the last several years is a demand for "transparency." This demand comes from "We the people" and, specifically for this post, its directed at the food industry. Now why are the People asking for transparency from the food industry? I have three letters for you GMO. Say whaaa? GMO stands for Genetically Modified Organism. What is that specifically?

    "A GMO, or genetically modified organism, is a plant, animal, microorganism or other organism whose genetic makeup has been modified using recombinant DNA methods (also called gene splicing), gene modification or transgenic technology. This relatively new science creates unstable combinations of plant, animal, bacterial and viral genes that do not occur in nature or through traditional crossbreeding methods." (Non-GMO Project)

    To make that easier to understand: Take the gene for spider silk (from a spider), and insert it into the DNA of a goat. Sounds totally Outer limits or twilight zone, but YES they have done this, and I want to say this is an extreme version of what a GMO is.

    Now there is LOTS of concern over GMO crops and the use of pesticides, herbicides and fungicides. These plants have been designed to have no response to, most of, these chemicals (the most notable one is glysophate, or in laymen's terms Round up) or in the case of Bt-Corn, to make their own toxin.

    Now I can see you scratching your head and asking yourself, why does this matter? It matters because of the potential impact on the environment and our overall physical health. In the United States GMO crops have been around for about 20 years, and no one really knew anything about them. Hell, most people didn't even know they existed till a few years ago. In my own state, we voted on whether or not companies needed to label products that included GMO derived ingredients, and unfortunately it was voted against. And despite being voted against, some companies are taking the high road and labeling their products that do have GMO ingredients. Now let me tell you which crops in the United States we have that are GMO and are produced commercially, and the most common, are: Soybean, Canola, Sugar Beet, Corn and Cotton. There are 9 main groups and if you include all the different varieties and cultivars, there are actually 60 in all.

    Now the main reason I started with this information is because consumers have become more interested in what is now going into the products they are buying and, because of this, it has made companies shift their labeling practices and change what ingredients they are using in their products.

    Now to get to the ooey gooey center of this whole thing: Consumer Products! I purchased two items from the same company (I have ZERO affiliation with any of these companies) and wanted to do a side by side look at the different ingredients each of them have. I did something similar with cake frosting and homemade frosting some time back, but this time I'm lookin at instant pudding! The reason why I am looking at the "same" item, both from the same company, is to highlight the exact shift in labeling and ingredients I mentioned above. Now lets get this dog and pony show started!

    When you read an ingredient list, whatever is first in the list is what makes up the vast majority of the product (by weight), each ingredient after that is a smaller and smaller amount (by weight).

    Pudding A:

    Sugar: Refined sugar, most likely from GMO sugar beets.
    Modified cornstarch: Chemically treated cornstarch to maintain texture in some foods
    Natural Flavor: Must be found in nature and provide flavor to the product but not actually add to the nutritional value of the item
    Artificial Flavor: Synthetic chemicals mixed together to create a specific flavor profile.
    Salt: "A crystalline compound, sodium chloride, NaCl, occurring as a mineral, a constituent of seawater, etc., and used for seasoning food, as a preservative, etc
    Disodium Phosphate: "used to enhance food characteristics including nutritional value and cooking performance"
    Tetrasodium Phosphate: Inorganic chemical phosphate sometimes used as a leavening agent.
    Monoglycerides: Emulsifying agent used to extern the shelf life of a product.
    Diglycerides: Emulsifying agent used to extern the shelf life of a product.
    Artificial color: "A combination of the 7 approved artificial food dyes"
    Yellow 5: AKA tartrazine; it is a yellow dye produced from petroleum and has been deemed safe by the FDA in food, pharmaceuticals and cosmetics.
    Yellow 6: A Coal Tar derived dye that ranges in color from yellow to orange and even red.
    BHA: Butylated hydroxyanisole, a compound that is added to preserve fats.

    Grand total: 13 Ingredients
    Package Weight: 3.4oz
    Cost: $0.97


    Pudding B:
    Cane Sugar: Juice extracted from Sugarcane then spun to form sugar crystals.
    Modified Cornstarch: Chemically treated cornstarch to maintain texture in some foods.
    Disodium Phosphate: "used to enhance food characteristics including nutritional value and cooking performance"
    Tetrasodium Phosphate: Inorganic chemical phosphate sometimes used as a leavening agent.
    Salt: namely Sodium chloride, a crystalline mineral compound added to enhance flavor
    Natural Flavor: Must be found in nature and provide flavor to the product but not actually add to the nutritional value of the item
    Monoglycerides: Emulsifying agent used to extern the shelf life of a product.
    Diglycerides: Emulsifying agent used to extern the shelf life of a product.
    Vanilla Beans: are the seed pods from the Flat leafed vanilla orchid, but can come from any of the vanilla orchid verities.
    Annatto (for coloring): "Annatto is the seed or extract from the achiote tree, which is indigenous to Latin and South America. Annatto is used heavily in Central and South America as a dye, medicine, and as an ingredient in many foods."

    Grand total: 10 ingredients
    Package weight: 3.4oz
    Cost: $1.59

    Both products weigh the same, and make the same amount.

    Pudding A:
    62 cents cheaper
    Cardboard box Packaging (recyclable)
    Inner paper pouch (recyclable)

    Pudding B:
    More expensive
    Plastic pouch packaging (Downcyclable)

    Just based on ingredients Pudding B wins.

    Here are the links!

    Tuesday, June 14, 2016

    The pits and nothing but the Pits

    Over the last 7 years, really since the birth of my first child, I have began to paying more attention to things. Most notably, to the ingredients that are used in the things we use every day. We take for granted that these things are for our benefit. Of late, my concern has been with my deodorant. Seriously. It has been a stinky problem for me in both a literal and metaphorical sense. Its very hard to find something that works well, and when you do find something that works, flip over the tube and look at the litany of ingredients you are slathering onto your armpit. I am not a crunchy granola hippie type. I am just a cognoscente human being concerned for my health and the health of my family and friends. I'm not going to take something and shove it in your face and say "Here, you have to do this, and your stupid if you don't." 1) that's just Rude. 2) when anyone does that, we immediately shut down and write the person off as a lunatic (and believe me I have done THAT a lot.) So after I switched from the main stream, mass produced, average, destink-stick I switched over to another main stream mass produced destink-stick that is Aluminum and paraben free, and had a total of 13 ingredients. At first thought: SWEET! Something that will work and not have some nasty stuff in it....... And that was it. I took what the label said and THAT WAS IT. And this is what we do all the time. Yes! I freely admit that I did not look any deeper. I am fallible. I am human. Putting that aside, I decided to do some ingredient sleuthing and looked deeper at what I was using.

    And the item of dissection is:


    So first off: Nothing is truly unscented. This has a light citrusy scent, not unpleasant at all. This also, and unfortunately, did not eliminate my stink. It reduced it by about 50% (in my estimation) so I had BO with a hint of citrus. Of the 13 ingredients there were 7, I either didn't know or I had an issue with. The other 6 were either water or plant extracts. So I skipped over those. Here are the ones I looked at closer.

    Dipropylene Glycol - Dipropylene glycol is a small molecular weight synthetic solvent.

    Proplyne Glycol- Propylene glycol is a synthetic liquid substance that absorbs water.

    Sodium Steriate - Sodium salt of stearic acid, a naturally occurring fatty acid. Surfactant - Cleansing Agent; Surfactant - Emulsifying Agent; Viscosity Increasing Agent -Aqueous; VISCOSITY CONTROLLING

    Trietheyl Citrate - Triethyl Citrate is a triester of ethyl alcohol and citric acid. Fragrance Ingredient; Plasticizer; ANTIOXIDANT; DEODORANT; MASKING; PLASTICISER; SOLVENT

    Triclosan - Triclosan is an ingredient added to many consumer products to reduce or prevent bacterial contamination. It may be found in products such as clothing, kitchenware, furniture, and toys. It also may be added to antibacterial soaps and body washes, toothpastes, and some cosmetics
    Triclosan is a chemical with antibacterial properties

    Tetrasodium EDTA - EDTA (ethylenediaminetetraacetic acid) is a chelating agent, used to sequester and decrease the reactivity of metal ions that may be present in a product.

    Allantoin - Allantoin is a chemical compound naturally produced by many organisms, including animals, plants, and bacteria. It is a frequent ingredient in lotions and skin creams, as well as in oral hygiene products, cosmetics, and other toiletries. It is also used in medications for dermatological conditions;It is effective at very low concentrations, usually from 0.1% to 2%.


    Ah Yes, You see that one highlighted in red. Triclosan.....an over used ANTIBACTERIAL. You read that right; an antibacterial in deodorant. Ugh. Our society had been overusing antibiotics not only in prescription form but also in everything else: Cosmetics, Meats..... As soon as I saw that one in the list I stopped using it. I don't think this is a necessary ingredient. I don't use any kind of soap with this ingredient, so I wont be using a deodorant with it either. I'm not going to regale you with the re-emergence of bacteria that have become antibiotic resistant. You can do your own search for those, this post is just for this particular item.

    So now you are wondering (or maybe not) what I am using to hide my stinkyness. Well when I do remember to slather deodorant on, I have decided to use this.


    And right there on the bottom right are the ingredients. I got the unscented because my nose is very sensitive and I can get headaches from things that are over scented, so I just skip the smelly stuff all together. And what scent this does have, makes me think of chocolate (because of the cocoa butter.) I have been using it now for about a week and while it does not eliminate 100% of my underarm smelliness, it does decrease it so significantly (I estimate about 80%) that I can walk by my sister and I don't get the look of disgust and asked "did you put on deodorant today?" This only has a total of 6 ingredients, and is about $5 more expensive. The only ingredient that left me scratching my head was this one:

    Saccharomyces Ferment - It claims to be non-toxic and harmless, and contains live enzymes that help to break down odor-causing compounds


    So depending on what you are looking for, and how it will react with your own body chemistry, there are options. My main issue with the first deodorant is the use of Triclosan. Something I find highly unnecessary in a deodorant, of all things. Also when looking into anything, just because it says "natural" does not mean it will agree with your body. It may cause skin sensitivity, rashes or other issues. Most places, in my personal experience, will accept a used item if it is returned in a timely fashion (under 30days) and you have the original receipt (this is also a good reason to save your receipts; I can thank my husband for that.) Just for good measure, check your local stores policy, just to be on the safe side. I'm not saying the first deodorant is bad, its just not one I will use anymore. The second one, for now, has my vote, but that could change down the line. I like the smaller amount of ingredients used, that its GMO, cruelty, and Gluten Free, and smells like chocolate to me. So the point of this post is that even as innocuous as an item may seem, check the ingredients, and look into them.


    Wednesday, February 3, 2016

    Yogurt Cubes!!

    Now you read the title and your thinking "cool, she froze yogurt in an ice cube trey." While that's an interesting idea, the answer would be No. That is not what I did at all. My boys are yogurt fiends (They have been going through 20!!! 6oz containers a week) and I have ZERO desire to clean up a yogurt mess they would make if I let them feed it to themselves. And it takes a good chunk of time to feed them, as I would have to first feed one while the other yelled at me or feed them tandem which, when they have colds, just doesn't work. So while eyeballing the lovely freeze dried yogurt drops that I spend a small fortune on, I decided to do an experiment. And I think I have it nailed!

    Here is what you need!
    • A bowl
    • A measuring cup
    • Whisk
    • Spatula
    • Gelatin (I used Knox brand, a friend over at The Paleo Homesteader recommends Great lakes Gelatin. You can purchase it at Amazon.com (Just click the link and it will whisk you there!) (There are lots of health benefits to gelatin.)
    • 2 six ounce cups of yogurt (I choose Tillamook yogurt. I am not affiliated with them in any way. I like the flavor of their yogurts above all the others I have tried. And we share a common home in the great state of Oregon.)
    • 5.3oz cup Greek yogurt (Again I chose Tillamook, in this demo I used vanilla. I have made it with other flavors and it works just the same)
    • Measuring spoons 1Tbsp, 1tsp and 1/4 tsp.
    • Half and half (milk will work as well)
    • 5x7 baking dish or similar sized dish.
    • Small ramekin to pour gelatin into (Pictured below)

    (This recipe was a 6oz strawberry and Greek vanilla mix. I recently did a batch with both yogurts being marrionberry and its so good! When both types of yogurt are the same flavor, the flavor is stronger.)

    Step 1) Measure out 1/4 cup of half and half and warm up in your microwave.


    Step 2.) While the half and half is warming, pour three tablespoons of cold water into your bowl.

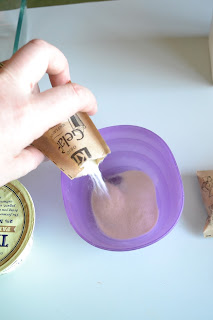
    Step 3.) Each packet of Knox gelatin has about 2.20 Teaspoons worth of gelatin. The total amount you are going to need is one whole packet PLUS 1.25 tsp from a second packet. If you are using gelatin from a large container (like Great Lakes) you are going to need 1Tbsp PLUS 1/2 tsp (total). Measure out your gelatin into a separate small dish.


    Step 4.) Sprinkle your gelatin into the water. It will get clumpy very fast so pay attention!


    Step 5.)  Mix the gelatin into the warmed half and half and whisk it together so that it is smooth. You have to get all the lumps out of the gelatin!


    Step 6.) Put both containers of yogurt into the bowl with your gelatin and whisk it all together till smooth.

    Yogurt In the bowl.

    Gelatin Mix going in!


    Whisk it baby!

    Step 7.) Once you have mixed the gelatin and yogurt together pour it into your 5x7 dish


    Step 8: Place your dish in the refrigerator for a couple hours so that it really has a chance to firm up. You can speed up the process by using the freezer but there's a chance you will forget they are in there! I know I have!! Make sure you cover it with a lid, tin foil, or saran wrap. the edges will start to dry out over time.


    Here's the end result!! An no judging. We are sitting on the floor in my kitchen eating these. LOL. My kids are not particular about locations to eat.
    (Please not that this is with regular Milk based yogurt. I do not know if soy based, almond milk based or coconut milk based yogurts will work)


       Perfect for little fingers!!


    Less mess? YES!


    Friday, January 29, 2016

    Footed Jammies fixed

    My family has been incredibly blessed. We have friends and family that take the cake on generosity. When I found out that the twins I was pregnant with were both boys we were a little shocked. I figured one of the was bound to be a girl. Nope. Such was not the case. LOL. So those 15 tubs of clothing I had socked away from my daughter were pretty much useless to me. I went through it and pulled all the gender neutral stuff, but that was maybe 1% of everything that I had saved. Probably less then that actually. So with the news of the babies being boys, I divvied up the clothes and passed them down to other people who were having baby girls or had larger little girls that the clothes fit. And in came all the goodies from the friends and family that had little boys!! Oh my gosh it was almost overwhelming! We received so much and we have been eternally grateful for it. The cost of formula alone for these two was a kick in the balls. It hurt the pocketbook that much. (And before anyone jumps on the "why didn't you breastfeed?" bandwagon. I did. I tried. my udders didn't make enough for even 1 baby, let alone two little piggies.) Just recently my boys have started to walk and before that I didn't think much of it. The feet of those awesome jammies. Well they weren't using the feet much since they were not walking but now that they are.....They need traction! Ha. On the carpet they are fine but on tile or laminate flooring.....its like watching a deer skate across a pond in winter. So upon inspection of some of the hand me down pajamas, in the larger sizes, the bottoms of the feet are all worn out, with holes, or the grippy stuff missing.

    Being who I am I decided to fix that. There is nothing wrong with the jammies. And who likes having their toe go through a hole? No one. So this is a tutorial for replacing the bottom of the footed pajamas :-) I hope someone out there finds it useful, and can salvage used and loved jammies :-)

    Now on with the show.....er....SEW!

    Here is what you will need.
    Jammies with holy feet.
    No slip grippy fabric 1/4 yard (you will probably find it in the utility fabric section)
    Sewing machine
    Thread (Does not have to be color coordinated with the clothing)
    Scissors (an itty bitty pair and a large pair for cutting fabric)
    Seam Ripper
    Pins (careful you don't poke yourself. I always seem to)
    Paper (not pictured)
    Pen (Not pictured)


    Here is a close up of the grippy fabric I used


    Step 1.)
    Turn your jammies wrong side out. You need to be able to get to the raw edge and seam.


    Step 2.)
    Slide one edge of your tiny scissors between the thread and the fabric and begin to snip the THREAD. (DO NOT CUT THE FABRIC) You can use your seam ripper for this but I found the scissors to be easiest.


    Step 3.)
    Once you have clipped the threads all the way around the foot, spread the edges of the fabric appart. You will see stitches about 1/4 inch in. Use your seam ripper and separate the two pieces of fabric. The toughest part of this will be where the manufacture backed stitched to lock the threads in place. The stitches are super tight and can be hard to get your seam ripper under. Just take your time and you will be able to get them all out.


    Just showing where they backstitched to lock the stitches. You will usually see it on the heel of foot.

    Step 4.) Once you have the bottom separated from the pajamas, lay it out flat on a piece of paper and trace around it. Make sure to lay it out as flat as you can.


    Step 5.) now cut out your pattern piece. When I did this it looked like the heel was slightly wider then the toe. But I don't think it was, which I realized afterwards. You can mark the heel on the pattern if you want.


    Step 6.) Trace your pattern onto the back of the grippy fabric.


    Step 7.) Now pin the grippy fabric to your jammies (Right sides together)! Make sure to do both feet. Try not to poke yourself. I always seem to!


    Step 8.) Now to sew! Sew around the foot with a 1/4 seam allowance. Take your pins out before your needle goes over them. If the needle strikes the pin, then it can bend or even break.


    Step 9.) Once you have done the first line of stitches you are going to do a zig-zag stitch. This will help hold everything together. Once you have done the zig-zag stitch do another row of straight stitches ( about a 1/8 inch seam allowance. You want the two rows of straight stitches to right on the edge of the zig zags. If you have a surger you could just surge it after the first set of straight stitches and be done. But I do not have one so this was my best option. 


    Step 10.) Before you turn the feet right side out make sure you cut all loose threads. You do not want these to wrap around your kiddos toes! You have been warned.


    And here are the new feet! My lil man was actually wearing these today. He had great traction on our slippery floors. I hope this tutorial will help out anyone who has this kind of hand me down issue. I know for myself it has kept a few sets of pajamas in circulation that otherwise may have been thrown out, or never worn.


    Thursday, January 7, 2016

    More then One use!

    If you have young kids, and I mean like crawling and attempting to walk, you know all the great paraphernalia that comes with them. And this time I am not talking about gear. I'm talking SNACKS. I swear my boys are eating us out of house and home. I honestly think one of them eats more then I do in a day; and times that by 2! My boys were also on formula, cause lets be honest, I made skim milk and not much of it when they were born (same issue I had with my eldest). So we had formula tubs coming out our ears (those were the plastic flip top kind but that's a different project!) Even now they are on a toddler transition formula, cause I feel they still need that extra something, so we have the cans from that, oh and coffee cans! Their crunchy snacks come in a can too.....and we do not have curb side recycling, so me going into town 20 minutes to the recycling center with two toddlers is just not happening! So what's a momma to do?? Improvise and upcycle! I actually found a use for all of these containers that, would otherwise, have gone straight into my garbage can. And the bonus is that my boys LOVE it. So here's what you need!

    Leftover cans from formula or snack: These cans are cardboard with a plastic lid for resealing and have a metal bottom. Save the lids someplace cause you can use these cans over and over for dry snacks, toys, etc...
    Paint: Use any kind of craft paint. The darker the color the easier it will cover any words on the cans. The liquitex paint is actually an acrylic art paint. More expensive per tube but awesome coverage.
    paintbrush: Use a wide brush. Covers faster and easier and your done that much faster.
    fine grit sandpaper (this is for the slick silver cans. These are the coffee cans and the toddler transition formula. Basically if the can under the wrapper is silver, your gonna have to sand it otherwise the paint will NOT stick to the can. And yes I found that out the hard way so you don't have to!)


    Here's the final result. I haven't gotten all of them painted, as you can see, but I did get some of them. We play games. I hide toys in the cans and I ask them to bring me whichever color can. They are young but its a start on color identification. We also flip them over and use them as drums! Music appreciation! They also enjoy turning them over and banging them on the floor. I have herd so much squealing and laughter over these cans. I love it! And at the end of the day I just make a pyramid out of them and tuck them in a low traffic spot.


    So there it is! Garbage to toys. Who knew?