CLICK HERE FOR FREE BLOGGER TEMPLATES, LINK BUTTONS AND MORE! »

Monday, December 31, 2012

NO SEW Tree Skirt!

I realize this is late since Christmas has passed us this year, and I sure hope you all had a wonderful holiday season, but i find I fall behind on things then at random times decide to work on stuff. Must be the insomnia kicking in. LOL.So Its 10:53pm on new years eve 2012, and here is a simple and easy tree skirt for your Christmas tree. Keep this in mind for next year. Cause its easy!! And, common, who doesn't like easy??

Supplies:
1.5 yards of felt in color of choice (I used white since my tree has a general snowflake theme each year)
Felt tip marker
Scissors
Salad plate
Ruler/Yard Stick (optional)
Round dinner table (Not required but it made cutting the circle so much easier!!)

Step 1:
Cut felt into a large circle. I used my dining room table as it is round to do this, cause for whatever reason I cant cut a round without a dotted line to follow. If you don't have a table to follow, fold the felt in half and cut a half circle. When you unfold the fabric you will have a full circle. (even following the edge of the table I still cant cut a circle!)

Step 2:
Using the salad plate eyeball the middle of the circle and trace around the plate with the felt tip pen. From the circle draw a straight line to the outside edge. You can use a yardstick or not, totally optional :-)


Step 3: Using your scissors cut along the marked lines removing the smaller circle.


Step 4: Drape around your tree and enjoy!

Now, normally I would put a picture of the skirt around my tree, and I did take a picture, but guess what, I cannot find it! Its maddening!

Anyways, You can add to it all you want, i think even sewing a ruffle around the edge would be cute, but that was more then I was going for. LOL
Hope you like!

Thursday, September 27, 2012

Pill Bottle Maracas

When my daughter was born I wanted to make things that she could use and play with that I didn't have to shell out bukoo bucks for. I am a right brain kind of person, and I like being able to repurpose stuff for other uses. Which is where the pill bottle maracas come in. Both my husband and I take Dr. prescribed medications so we always have a few empty pill bottles each month that we were throwing out. I decided to do something with them! These were actually one of my daughters favorite toys and we still have them in her music box, and we still have "jam sessions" with them. She has 8 different ones and she always insists I use them all at once while she hammers away on her xylophone. LOL.

So this is how I made them!

Supplies:
Medicine bottles (you can use prescription or OTC medicine bottles as long as they are hard plastic)
Super glue
Clear box tape
Sticky back glitter/holographic paper
scrapbook paper
stickers
modge podge.
Ruler
Various items to put inside the bottle (Like rice, beads, penny's etc...)

Holographic papers come in a variety of styles and are probably the easiest of all of the papers to work with since they already have a sticky back.


There are so many different designs of scrapbook paper its hard to decide which ones to use!


Stickers are always fun to use too!


There are a variety of different things you can use inside to make noise. The picture above just shows you a few different ones. Notice that there are 4 different piles of beads, thet's because each type of bead shown makes a different sound when shaken around.
Step 1: Gather your medicine bottles
Step 2: Separate cap from bottle and wash both pieces. Soak bottles and caps in hot water to loosen labels. Peel off labels then scrub bottles with a scrubby to remove label residue (you don't have to get all of the remaining stickiness from the labels off, you just want it to be a smooth surface to work on)


Since there are two different paper types listed above, lets start with the easier of the two, the sticky backed holographic/glitter paper.

Step 3: Using a ruler measure the height of the flat section of the bottle. (For the bottles shown above they are 2 1/4 inches tall. Subtract 1/8 inch from the height of the bottle and this is how wide you want your paper to be (2 1/8 inches tall)


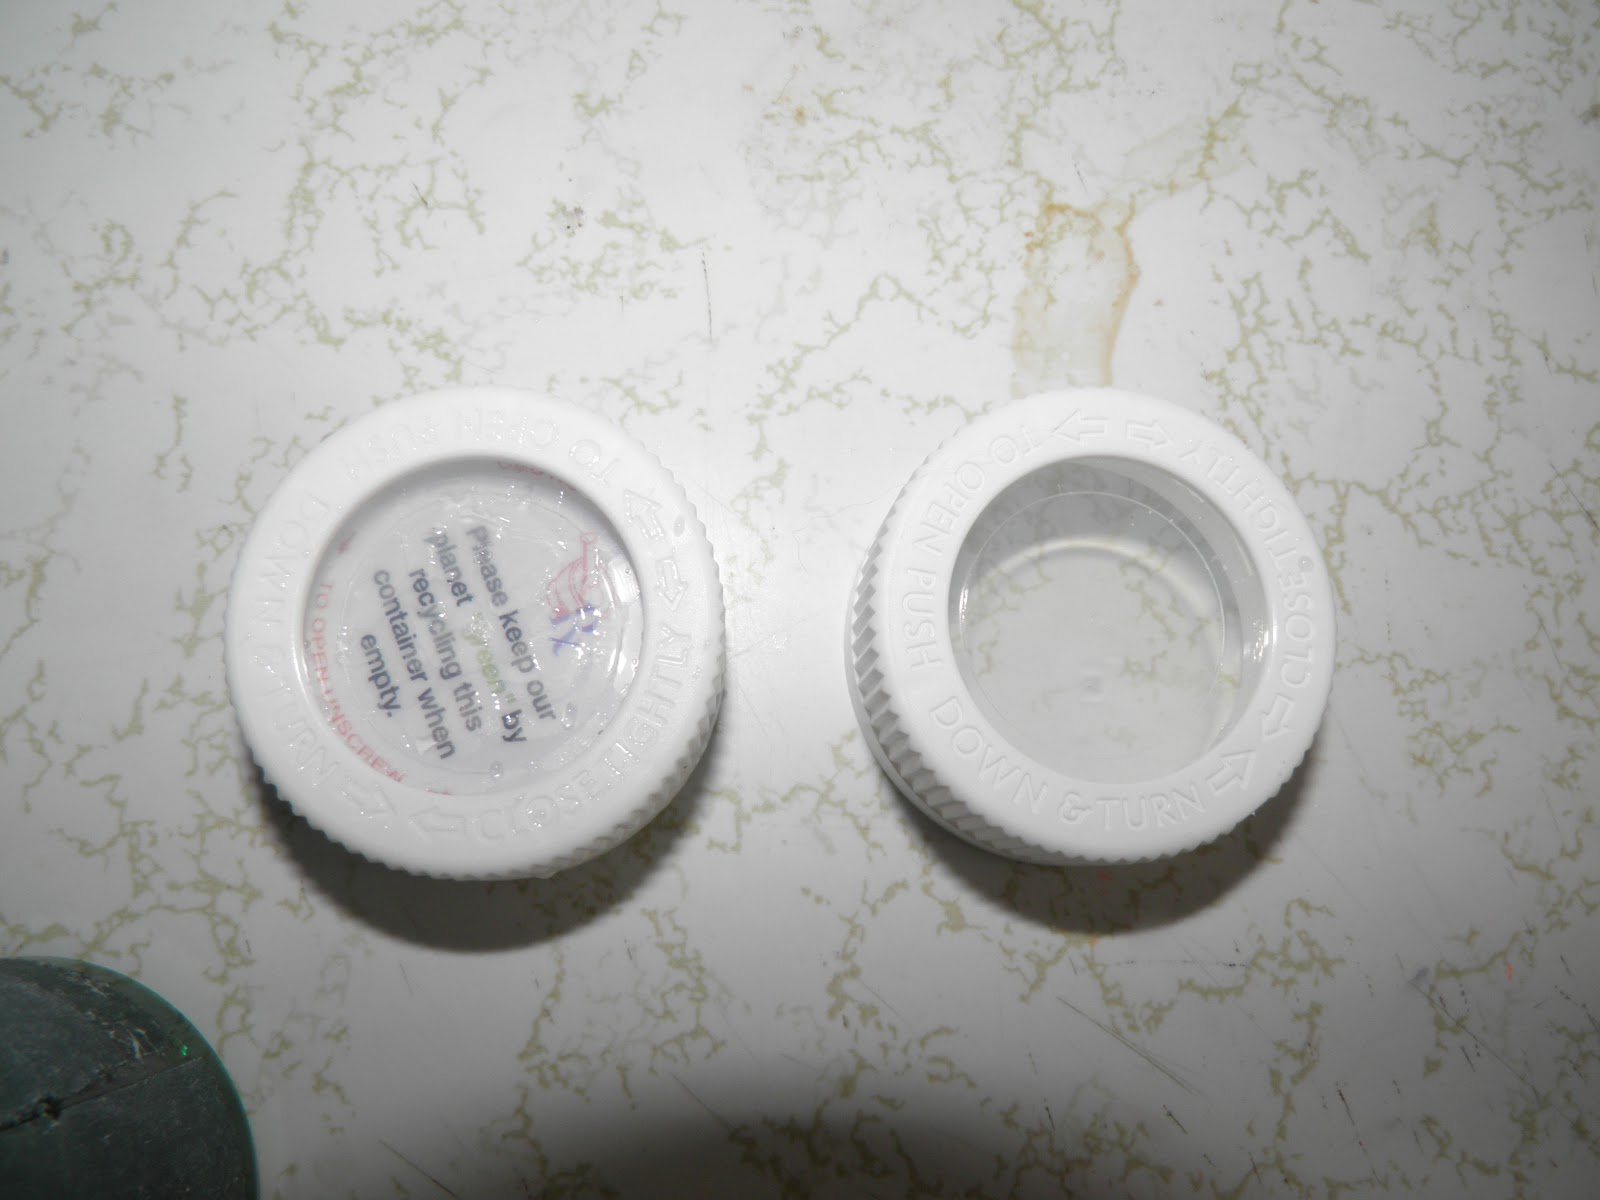
Step 4 (optional depending on the type of cap your bottles use) The bottles I used have an insert in the cap. I used a tack and pulled the insert out, recycled the info part and kept the Styrofoam part (which you can see pictured above) to be used in the finished piece. I peeled off the backing on a small square of holographic paper and stuck the insert to the back and cut around it and popped it back into the lid.
 

Step 5: Peel the backing off the back of the holographic paper and line it up so that there is a little space between the top and the bottom of the body of the bottle (see above image as an example) and wrap the paper all the way around the bottle and overlap your starting place, trim the excess.

Step 6: Now choose what you want to put into your bottle. In this one I used some linguine noodles (spaghetti noodles will sound differently then linguine noodles will when you shake these.)


Step 7: Now use rim the inside of the cap with superglue. then twist into place on the bottle (after you have placed your items inside to make noise with) "childproof" caps are not really childproof despite what manufactures say, Super gluing them in place makes it more then difficult for someone to get the caps off. Let this dry for about 10 minutes.d


Once you do that its ready to play!


Scrapbook paper covered Pill Bottle Maracas

Step 1: Gather your medicine bottles


Step 2: Separate cap from bottle and wash both pieces. Soak bottles and caps in hot water to loosen labels. Peel off labels then scrub bottles with a scrubby to remove label residue (you don't have to get all of the remaining stickiness from the labels off, you just want it to be a smooth surface to work on)

Step 3: Using a ruler measure the height of the flat section of the bottle. (For the bottles shown above they are 2 1/4 inch's tall. Subtract 1/8 inch from the height of the bottle and this is how wide you want your paper to be (2 1/8 inch's tall)

Step 4: If the lids to your medicine bottles have an insert like mine, use a square of the scrapbook paper you have selected and trace the insert on the back of the paper and cut out. Pop the paper and the insert back into the lid.

Step 5: Turn you bottle on its side and apply a line of modge podge to the bottle. I used my fingers, but you can use a brush to spread the glue all over the bottle where the paper will be.


Step 6: Place your paper on the bottle leaving a small space at the top and bottom and wrap the paper around the bottle, smoothing any air bubbles out as you go along.


Step 7: Once you have wrapped the paper all the way around, you will want to overlap the tail of the paper over the start. Apply a small line of modge podge and smooth into place. Let this dry completely before moving to the next step.

Step 8: Once the modge podge has dried you are going to cut a 5 inch piece of clear packaging tape and wrap it around the bottle. The tape is narrower then the bottle, at least in my case it was, so you may need to cut another, narrower piece to cover the remaining exposed paper.


Step 9: Next you will put your items inside the bottle. For this one I chose plastic beads.

Step 10: Using super glue you want to rim the threads of the cap. Once you have done this twist the cap into place on the medicine bottle and let dry for about 10 minutes. That's it your done!


Now let your kids make some noise!


Canning it up! City style: Part 2!

So in my last post I noted that since my daughter is such a picky eater I have a tendency to freeze the things that she is not a fan of. So that bag of cherries that was sitting in my freezer? It was just waiting for me to do something with them. and inspiration dawned. Jam! I had enough to make about 8, 4oz jars. 

One of the things that we have learned over time is to freeze all our fruits and veggies before we work with them, at least if we are using the Squeezo. Why do you ask? Well when you freeze liquid it expands. In the case of fruits or berries the freezing action causes the cell membranes in the berries to burst. What does this mean in the grand scheme of things? More juice!!

So once the cherries were thawed completely, I popped the pits out then ran the cherries through the squeezo. I also had a few Bartlett pears sitting around getting to the point of overripe, so I peeled chopped and seeded them then processed them through the squeezo with the cherries. Yummy! I compost the waste from the squeezo. I try to waste as little as I can. (this is the only planet we get!) Anyways, now that I have my fruit prepared I measure how much I have. Each recipe is different depending on the type of pectin you use. I like the ball pectin, but there are lots of different ones out there, and the directions that come with the pectin are easy to follow. I recently used the sure-jell brand and i was unimpressed. The two batches i used it in never set up and have been relegated to ice-cream topping (which isn't a bad thing.) The nice thing about the ball pectin is it comes in a tub and you use it by the tablespoon. I followed the other brands recipe to the letter and it never came together. I was disappointed, but at least its still usable.

From what I have figured out from trial and error is 1 tablespoon pectin to 1.33 cup of fruit. I have also ratioed out 1 cup of sugar per 1.33 cup of fruit as well. So once I got all my fruit squeezed I measured out how much I had then used the requisite amount of pectin and sugar for the amount of fruit I had, which wasn't allot. I had a few accidents in my first batch of jam, with cracking 2 jars and shattering 1.

Turned out my problem was in getting the water in my pot to a close to the same temperature as my jam. Well shoot, I didn't have the right kind of thermometer. I improvised and used my meat thermometer. Came in handy for more then just checking to see if my roast is done right. LOL. OK. maybe I am getting ahead of myself. Let me go back and I will do this as a step by step. It may sound like allot of work but its really not.

Step 1: wash jars.

Step 2: Get your waterbath pot going
.
Step 3: get a separate, smaller, pot of water going and put your lids and rings in it and bring it to a bubble. (these have to be sterilized or you risk contamination of your finished goods)

Step 4: Gently place cleaned jars on wire rack in waterbath caner, submerge and bring to a boil.
(at this point you want to follow the directions on the pectin package. Since I use the Ball brand pectin, I will outline those directions here.)


Step 5: Combine prepared fruit and lemon juice (if required (this info can be found on the ball pectin label)) in a large saucepan. Gradually stir in Pectin. Add butter (1/4 tsp to reduce foaming*) Bring mixture to a full rolling bubble that cannot be stirred down, over high heat, stirring constantly. (I recommend you use a wooden spoon. Some plastic spoons cant handle the heat, so a nice sturdy wooden spoon is good to have, I learned this the hard way.)

Step 6: Add entire measure of sugar stirring to dissolve. Return mixture to a full rolling boil. Boil hard for 1 minute stirring constantly. Remove from heat and skim foam if necessary. * I use the 1/4 tsp butter and I have had no problem with foaming. (this is when I use the thermometer to check the temp of both the jam mixture and the waterbath, if they are within a close range of each other your all good!)

Step 7: Remove jars from water bath.

Step 8: Ladle hot jam into hot jars 1 at a time, leaving 1/4inch space between the top of the jam and the lip of the jar. Wipe the rims of the jars to remove any spillage. Center lids on jars. Apply bands and adjust to fingertip tightness. (Use a towel, the jars are going to be HOT!)

Step 9: Place jars in caner. The jars need to be covered by 1 to 2 inches of water. Place lid on caner and bring to a gentle boil. Boil 10 minutes. *according to the package directions it says to turn off water and let sit for 5 minutes before removing jars from the waterbath. Quite frankly I have never done this. I always have more jars then my caner can hold so I let them go beyond the 10 minutes, not more then 15, and just pull them out of the waterbath and place them in the box the jars came in. They stay hot together and cool down gradually together.  

While the jars are in the waterbath you may hear some popping noises. this is good! This means the jar has a good seal. Some will do this after they have been removed from the waterbath. This is a great sound to hear when you have put all this energy into making something your family will enjoy! If there is any flex in the lids after 24 hours, you need to pop that jar into the fridge and start using it. It means it didn't seal well. AND guess what? THAT'S IT! You have made jam with your own two hands! Woo hoo! See I told you anyone could do this, so don't think that its only the country folk who can. Just because you live in the city doesn't mean you can do some of the same things as country folk do. So i hope this encourages you to go out and try it!
(These are a few jars of pear nectarine jam I made. DELISH!)

Friday, September 21, 2012

Canning it up! City style: Part 1

So even though I was born and raised in the country, or as I affectionately call it "the boonies" I now live in the city. I miss being able to just walk out my door and do certain things that we just cant do here in town, like go play with the goats, talk to the cows, or walk from the house to the river.


Simple things, but they were awesome. The picture above was taken by my brother in law at my parents place. These are a few of my dads heifers (a female bovine that has never had a calf) in with the new bull.  I have NEVER bought beef at the grocery store. This is a point of pride. We have always raised our own. anyways, that's off track.....where was I going?? Oh yes! The point of this entire post! Canning! Anyways what I was saying before I am a country girl who lives in the city. and YES you can CAN!! My mom did allot of canning when I was younger and now that I have a child of my own, I want to show her how, granted she is still young, we have a great time working on it together. 

My daughter is three and is the pickiest eater so when we go to the grocery store, I like to get different fruits and veggies for her to try. Needless to say somethings just don't go over well. That bag of black cherries I bought?? Yup, they didn't fly with my monkey. So I took the whole bag, dumped it into a freezer zipper bag and tossed in the freezer. You can practically CAN anything! And since I had those cherries in there so I decided to thaw them, pit them and squeeze the life out of them! And how do I do this you ask??SQUEEZO!

I know sounds hilarious but its a manually powered seeder/sieve. I run everything through it! Tomato's, fruits, veggies, you name it! (You cant do cherries since they have pits and not lil tiny seeds like tomato's or blackberries, so I had to pit them first.) It runs about $195 but its well worth it. The one I use gets passed between three houses (my mom, me and my older sister) and is probably about 25 years old. Its well worth the investment. I like having the tools so that I can do things by hand. Which is weird since I always wanted the latest and greatest as a kid (which I never got, so go figure right??) And one of the nice things of the squeezo is that my daughter (who is only 3) can help out! (shes always begging to help!)
(Picture from Amazon.com)


(My monkey getting in on the squeezo action.)

Technically you don't even need a squeezo. I prefer my jams/jellies to be seed free, that's why I use it. So if you don't want to put out the money for the squeezo, and dont mind seeds, these are the tools that you are going to need.
Jars (Ball or Kerr are the most common)
Two part lids (When you buy a pack of jars, which come in a case of 12, they come with the two part lids. I reuse jars so I have to buy the lids and rims sometimes)
Pectin (for jam making)
fruit
Wooden spoon
THAT'S IT!

There are other types of preserving but I am focusing on jam :-) and you will need the above tools whether you use a squeezo or not.

Wednesday, September 12, 2012

Cupcake Stand!

Pinterest has become and addiction of mine. I call it Crafters Crack. There are so many ideas!! I think I would need a lifetime or two to get through all that I want to do! And where to start! Now that's a dilemma. Well I decided to make a cupcake stand. So seeing something similar on pinterest, the finished product, I wanted to make one. Unfortunately the link I choose didn't have a tutorial, so guess what? I decided to make the tutorial myself! So Getting my handy-dandy camera out, I photographed what I was doing step by step. So here it is! I really like the end result!

First things first, gather what you are going to need to complete the project. Many times I have started a project and not had enough stuff to finish it (just ask my husband) and had to put it on hold till later (I hate that).

Supplies:
Dinner plate & Salad Plate (The salad plate is about 3/4 the size of the dinner plate, they don't have to match but for me I wanted them to. I love hitting up second hand shops for things like this cause they are hella cheap!)
Two clear candle holders
Aleenes Platinum Bond Glass and Bead Adhesive
Loctite clear silicone sealant
Tounge Depressor
Paper towel
Ruler
Marker (I use permanent, you wont be able to see the markings when you are done and they will eventually wash off.)

Step 1:
Wash and dry plates (a no brainer right?)

Step 2: Using your ruler make a big X on the backside of the plate. Don't make the X willy nilly. Actually take time and measure the distance of the bottom of the plate (Mine were 7in and 5 in.) and plop your dots right in the middle (mine were at 3.5 and 2.5) Do this on both plates.


Step 3: Now that you have the plates done up with their X's Use the glass and bead adhesive and apply it to the candle holders top.

Step 4: Take the candle holder and flip that bad boy over and align it over the center of the X on one of the plates. (the glass and bead adhesive needs to set for about 24 hours according to the directions, so find a place, out of the way, to let this sit. This adhesive is worth it cause its got HOLD)

Step 5: Use the tongue depressor (craft stick) or towel to wipe around the edge of the candle holder to clean up any squeezings (Ya know the stuff that comes out as you press two things together, makes me think of a smores. LOL)

Step 6: Once you have allowed the adhesive to set mark a dot in the center of the larger plate.
Step 7: By this point you should have two single stands. One small and one large. Take the smaller of the two and situate it so that the candle holder is up facing you. Apply adhesive around the rim of the candle holder base.  then center it over the dot and press down. You should have something that looks like this (only upside down)
Step 8: Allow it to sit undisturbed for another 24 hours for the adhesive to set.

Step 9: Once you have done this you can use the Loctite silicone sealant around the parts of the candle holders that actually touch the plate. (Wear gloves, this stuff is sticky and stinks. I use the waterproof sealant that way I can wash this without the adhesive getting all persnickety with me, and notice my individual finger glove I am using to smear it with? Yup that's a sandwich baggie.) Let the whole thing sit or another 24 hours so that it has time to dry.

Step 10: By this time it should be all done and ready to rock N roll! I used tomato's to demonstrate it. LOL. I didn't have any cupcakes on hand!