When my daughter was born I wanted to make things that she could use and play with that I didn't have to shell out bukoo bucks for. I am a right brain kind of person, and I like being able to repurpose stuff for other uses. Which is where the pill bottle maracas come in. Both my husband and I take Dr. prescribed medications so we always have a few empty pill bottles each month that we were throwing out. I decided to do something with them! These were actually one of my daughters favorite toys and we still have them in her music box, and we still have "jam sessions" with them. She has 8 different ones and she always insists I use them all at once while she hammers away on her xylophone. LOL.
So this is how I made them!
Supplies:
Medicine bottles (you can use prescription or OTC medicine bottles as long as they are hard plastic)
Super glue
Clear box tape
Sticky back glitter/holographic paper
scrapbook paper
stickers
modge podge.Ruler
Various items to put inside the bottle (Like rice, beads, penny's etc...)
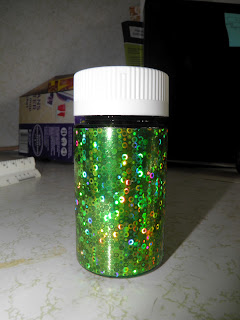
Holographic papers come in a variety of styles and are probably the easiest of all of the papers to work with since they already have a sticky back.
There are so many different designs of scrapbook paper its hard to decide which ones to use!
There are a variety of different things you can use inside to make noise. The picture above just shows you a few different ones. Notice that there are 4 different piles of beads, thet's because each type of bead shown makes a different sound when shaken around.
Step 1: Gather your medicine bottles
Step 2: Separate cap from bottle and wash both pieces. Soak bottles and caps in hot water to loosen labels. Peel off labels then scrub bottles with a scrubby to remove label residue (you don't have to get all of the remaining stickiness from the labels off, you just want it to be a smooth surface to work on)
Since there are two different paper types listed above, lets start with the easier of the two, the sticky backed holographic/glitter paper.
Step 3: Using a ruler measure the height of the flat section of the bottle. (For the bottles shown above they are 2 1/4 inches tall. Subtract 1/8 inch from the height of the bottle and this is how wide you want your paper to be (2 1/8 inches tall)
Step 4 (optional depending on the type of cap your bottles use) The bottles I used have an insert in the cap. I used a tack and pulled the insert out, recycled the info part and kept the Styrofoam part (which you can see pictured above) to be used in the finished piece. I peeled off the backing on a small square of holographic paper and stuck the insert to the back and cut around it and popped it back into the lid.
Step 6: Now choose what you want to put into your bottle. In this one I used some linguine noodles (spaghetti noodles will sound differently then linguine noodles will when you shake these.)
Once you do that its ready to play!
Scrapbook paper covered Pill Bottle Maracas
Step 1: Gather your medicine bottles
Step 2: Separate cap from bottle and wash both pieces. Soak bottles and caps in hot water to loosen labels. Peel off labels then scrub bottles with a scrubby to remove label residue (you don't have to get all of the remaining stickiness from the labels off, you just want it to be a smooth surface to work on)
Step 3: Using a ruler measure the height of the flat section of the bottle. (For the bottles shown above they are 2 1/4 inch's tall. Subtract 1/8 inch from the height of the bottle and this is how wide you want your paper to be (2 1/8 inch's tall)
Step 4: If the lids to your medicine bottles have an insert like mine, use a square of the scrapbook paper you have selected and trace the insert on the back of the paper and cut out. Pop the paper and the insert back into the lid.
Step 5: Turn you bottle on its side and apply a line of modge podge to the bottle. I used my fingers, but you can use a brush to spread the glue all over the bottle where the paper will be.
Step 6: Place your paper on the bottle leaving a small space at the top and bottom and wrap the paper around the bottle, smoothing any air bubbles out as you go along.
Step 7: Once you have wrapped the paper all the way around, you will want to overlap the tail of the paper over the start. Apply a small line of modge podge and smooth into place. Let this dry completely before moving to the next step.
Step 8: Once the modge podge has dried you are going to cut a 5 inch piece of clear packaging tape and wrap it around the bottle. The tape is narrower then the bottle, at least in my case it was, so you may need to cut another, narrower piece to cover the remaining exposed paper.
Step 9: Next you will put your items inside the bottle. For this one I chose plastic beads.
Now let your kids make some noise!


0 comments:
Post a Comment